


Zoom Transcription Services – As Zoom continues to climb in popularity and the business world learns to function in a hybrid work environment, the need for audio transcription and the captioning of video calls occurring on the platform is becoming increasingly important.
Zoom Transcription Services Table of Contents:
- Why use Zoom transcription services?
- Can Zoom create a transcript?
- How to use transcription in Zoom
- How do I turn on transcription on Zoom?
- How to get a transcript of Zoom recordings
- Verbit’s Zoom transcription services
- Why use Zoom captioning services?
- Verbit’s live captioning Zoom service
Why use Zoom transcription services?
Receiving transcriptions of Zoom audio transcriptions is a great way to keep your meetings documented. As soon as participants are aware the session is being documented and recorded, there’s little need for note-taking. You’ll notice participants focus more on the speaker and really listen to what’s being said.
Another benefit of using Zoom transcription services is that the transcript can be referenced at a later time or used to look back on if a session was missed. Users can search for keywords within the transcript to find informational snippets and use them to highlight key points of interest.
Can Zoom create a transcript?
Yes, Zoom has a service for audio transcription. It offers you access to automatic transcription of the audio of your meeting or event that’s recorded to the cloud. Zoom will process the Zoom transcript, and when you login you’ll be able to see it or share it as a VTT file. Better yet, Zoom users can opt to have the transcript displayed as text within the video recording itself.
These Zoom transcripts are separated out and marked with helpful timestamps which indicate when during a call something was mentioned. This can be helpful if you’re telling Sally from your team to go back and take notes on what a client shared around their end of year budget which you know happened around the 25-minute mark. Sally can then go into the created transcript from Zoom, scroll to minute 25 and copy and paste the direct quote out.
With Zoom transcripts, users can also add capitalization and punctuation, which are not captured by the automatic transcripts being generated.
How to use transcription in Zoom
Live transcripts can be especially helpful in Zoom for calls, meetings, webinars and the like. With live transcripts, you’re able to scroll back and read through the dialogue during a Zoom session. This functionality allows you to reference items which were said so you may discuss them further while still on the call.
Transcripts can appear within your Zoom window with the right application or with Zoom’s automatic transcription for ease of use and simple viewing. Sharing your Zoom transcription after recording meetings can also be invaluable. These transcripts can also be helpful for team members who are re-watching recorded Zoom meetings if they could not attend live. You can share the meeting recording with them and they’ll see the transcript on the right side window with time stamps depending on the one you use. These transcripts can help them to also sift through an entire one-hour meeting and go right to the part they want to rewatch, saving them a lot of time.
How do I turn on transcription on Zoom?
If you’re using the transcription Zoom provides or a partner which integrates directly into the Zoom platform, you can turn on transcription via the Zoom navigation bar. Zoom live transcription can be used in a variety of ways and provide a helpful visual aid to your participants.
If you hover over your Zoom window and a Zoom live transcript is enabled for use, you simply click the CC button. Then you click to ‘View full transcript’ and you’ll start to see a transcript of your dialogue appear live as you and your team members speak.
How to get a transcript of Zoom recordings
Obtaining a transcript of Zoom recordings can seem easy with the automatic tools built-in, but getting one that’s accurate is another story. It’s best to turn to a paid provider to ensure your transcripts are accurate. Transcripts with errors can make your business look unprofessional when shown live or shared after. These errors can also create greater confusion for individuals with disabilities, such as those with ADHD who struggle with note taking and who rely on transcripts to work efficiently.
Verbit is one partner you can turn to for transcripts of Zoom recordings that are delivered with high accuracy for accessibility to support compliance efforts with the Americans with Disabilities Act, FCC and other compliance guidelines you may need to take into account. Zoom automatic transcription alone can often miss the benchmark for accessibility.
Verbit’s Zoom transcription services
To keep up with the increasing demand for transcription services, Verbit unveiled an exciting integration with Zoom a few years ago which it continues to expound upon. It provides embedded transcription within the Zoom application itself for easier use. It also enhances what transcripts are capable of over Zoom auto transcription. This integration means that meetings, conference calls, webinars and online courses can all be accurately transcribed in real-time.
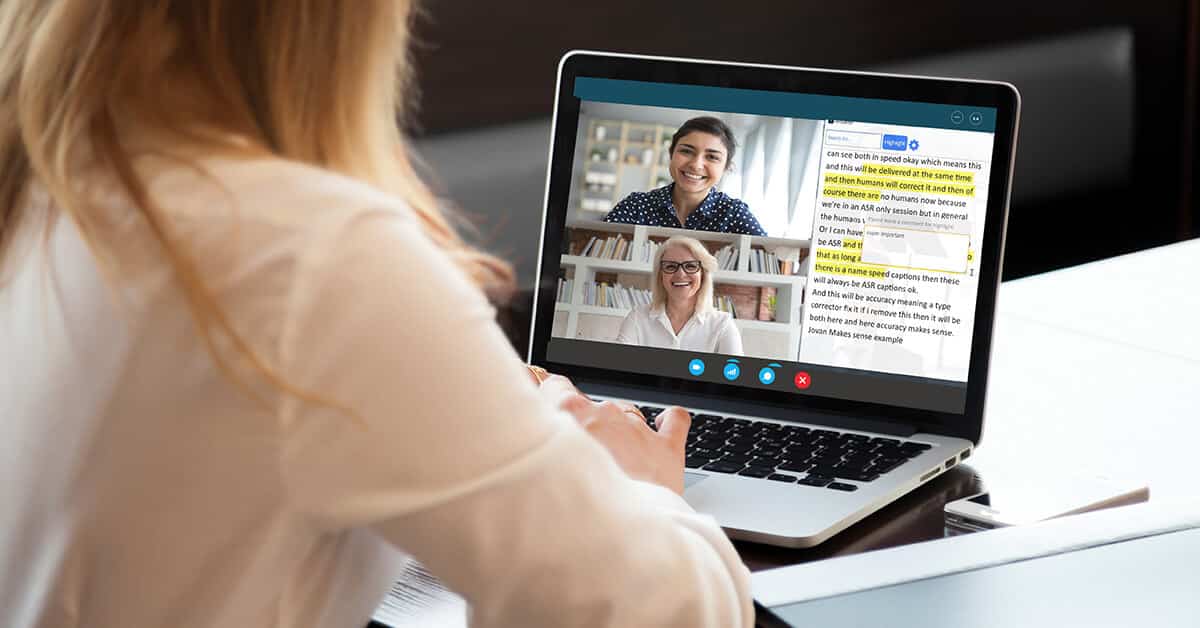
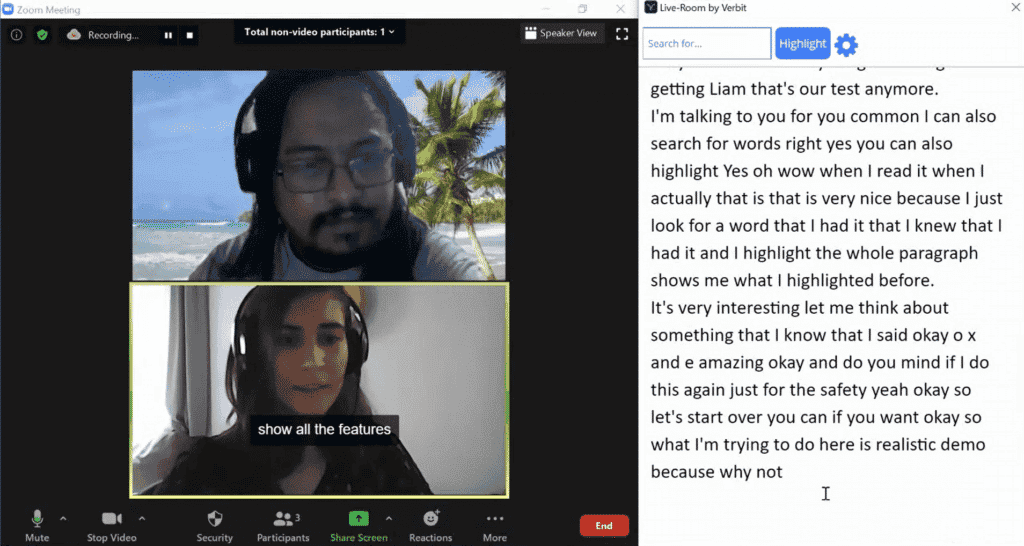
Using this Zoom video transcription service allows you to accumulate data and keep track of all the information discussed in calls. Within the transcript itself, users can take notes, highlight useful sections and use a special research tool to search for difficult terminology (notice the search tool at the top right of the image below). This solution can also be helpful to offer Zoom transcription without recording and simply in live sessions when you may not want a record afterward. However, if you do, Verbit can also provide you one.
How does the Zoom integration work?
Live communication access real-time translation (CART) services are offered to provide a transcript of Zoom conversations on the side of video or audio calls. You can see an example of how this looks in the image above.
Verbit’s Zoom integration process is as follows:
- One time setup of the integration itself.
- Select between transcription (and captions) within a profile that is set up on Verbit’s platform.
- Schedule a CART session in the Verbit platform and join a Zoom meeting.
- Verbit will connect to the session’s audio to produce an accurate transcript.
Why use Zoom captioning services?
Enlisting a Zoom transcription service won’t break your bank in the slightest and the same is true of captioning. Features built into Zoom can greatly enhance eLearning and business conferencing experiences, making it well worth it, but it won’t be expensive regardless.
In today’s modern world, more and more users have come to not only want, but expect captions with their video content. In fact, 85% of Facebook videos are watched without sound. Many people tune into videos while on public transport or simply enjoy having subtitles there. Having Zoom sessions captioned means that not only those who are hard-of-hearing can take part in the session, but also those who wish to turn the sound off can do so. Video conferences that are captioned can also help participants understand a difficult accent or a host speaking unclearly. Captions encourage participants to better engage as they can take in what’s being said, word-for-word.
The growing importance of accessibility
Adding captions to Zoom calls and providing transcripts post-call is a move toward accessibility. It simply helps to attract a much wider community. But why does accessibility really matter? Here are just a few reasons:
- 466 million people are deaf or hard of hearing worldwide.
- Only 360 million people speak English as their first language, meaning, captions will help non-native speakers take in what’s being said.
- A workplace promoting a fully inclusive environment primes all employees for equal opportunities.
- Diversity and inclusion impact the bottom line as individuals have a growing interest in working or supporting companies committed to inclusivity.
With Zoom becoming an integral part of many business operations, there is a clear demand for additional features. It’s important to stress that educational institutions and workplaces promoting accessibility don’t just benefit those with disabilities or those non-native to the language spoken in the session. Those using Zoom live captioning and Zoom audio transcription are offering more ways to consume information and subsequently increasing their meeting engagement levels.
Verbit’s live captioning Zoom service
In addition to the transcription feature, Verbit also supports a closed captioning Zoom integration. This cutting-edge feature offers live captioning for Zoom calls that appear in real-time. This functionality will help provide increased engagement and accessibility in a number of settings including for:
- Students in higher-ed
- Online learners
- Legal professionals
- Business leaders
Once the integration is set up, the meeting host simply needs to select ‘Closed Caption’ within Zoom to get the caption party started.
Together, these technologies are helping online learners and businesses provide an inclusive environment. Many universities, for example, have struggled with the fast move to converting all of their courses online. Verbit’s Zoom closed captioning service ensures that students are provided with an equal opportunity to access course materials. Students with dyslexia or disabilities no longer need to rely on in-person notetakers if they have access to transcripts. In a business setting, Verbit’s Zoom integration can help lawyers and employees by providing live recordings of all correspondences.
Having access to your Zoom recording transcript on a daily basis can be invaluable. However Zoom transcription software only reaches its value potential if its results are accurate. For more information on how to utilize Verbit’s Zoom meeting transcription, captioning integration or learn about Zoom audio transcript capabilities, contact us today.